In this tutorial I would like to introduce you to a brand new feature that will take your fuzz-testing to the next level - we really mean it. We will be fuzzing JSON like never before and we will be using the fuzzer tool from the Online Suite.
Unlike some other tools, JSON fuzzing is very natural task inside our Fuzzer, which can be combined with all other transforms, generators and whatnot to create really powerful and exhaustive setups. For the purpose of demonstration, we will setup a simple test case to explore all interesting features.
Step 1 - Make some variables
If you are following us on Twitter you may have seen our update on using variables inside variables. We will use this feature to breakdown this task in more meaningful chunks.
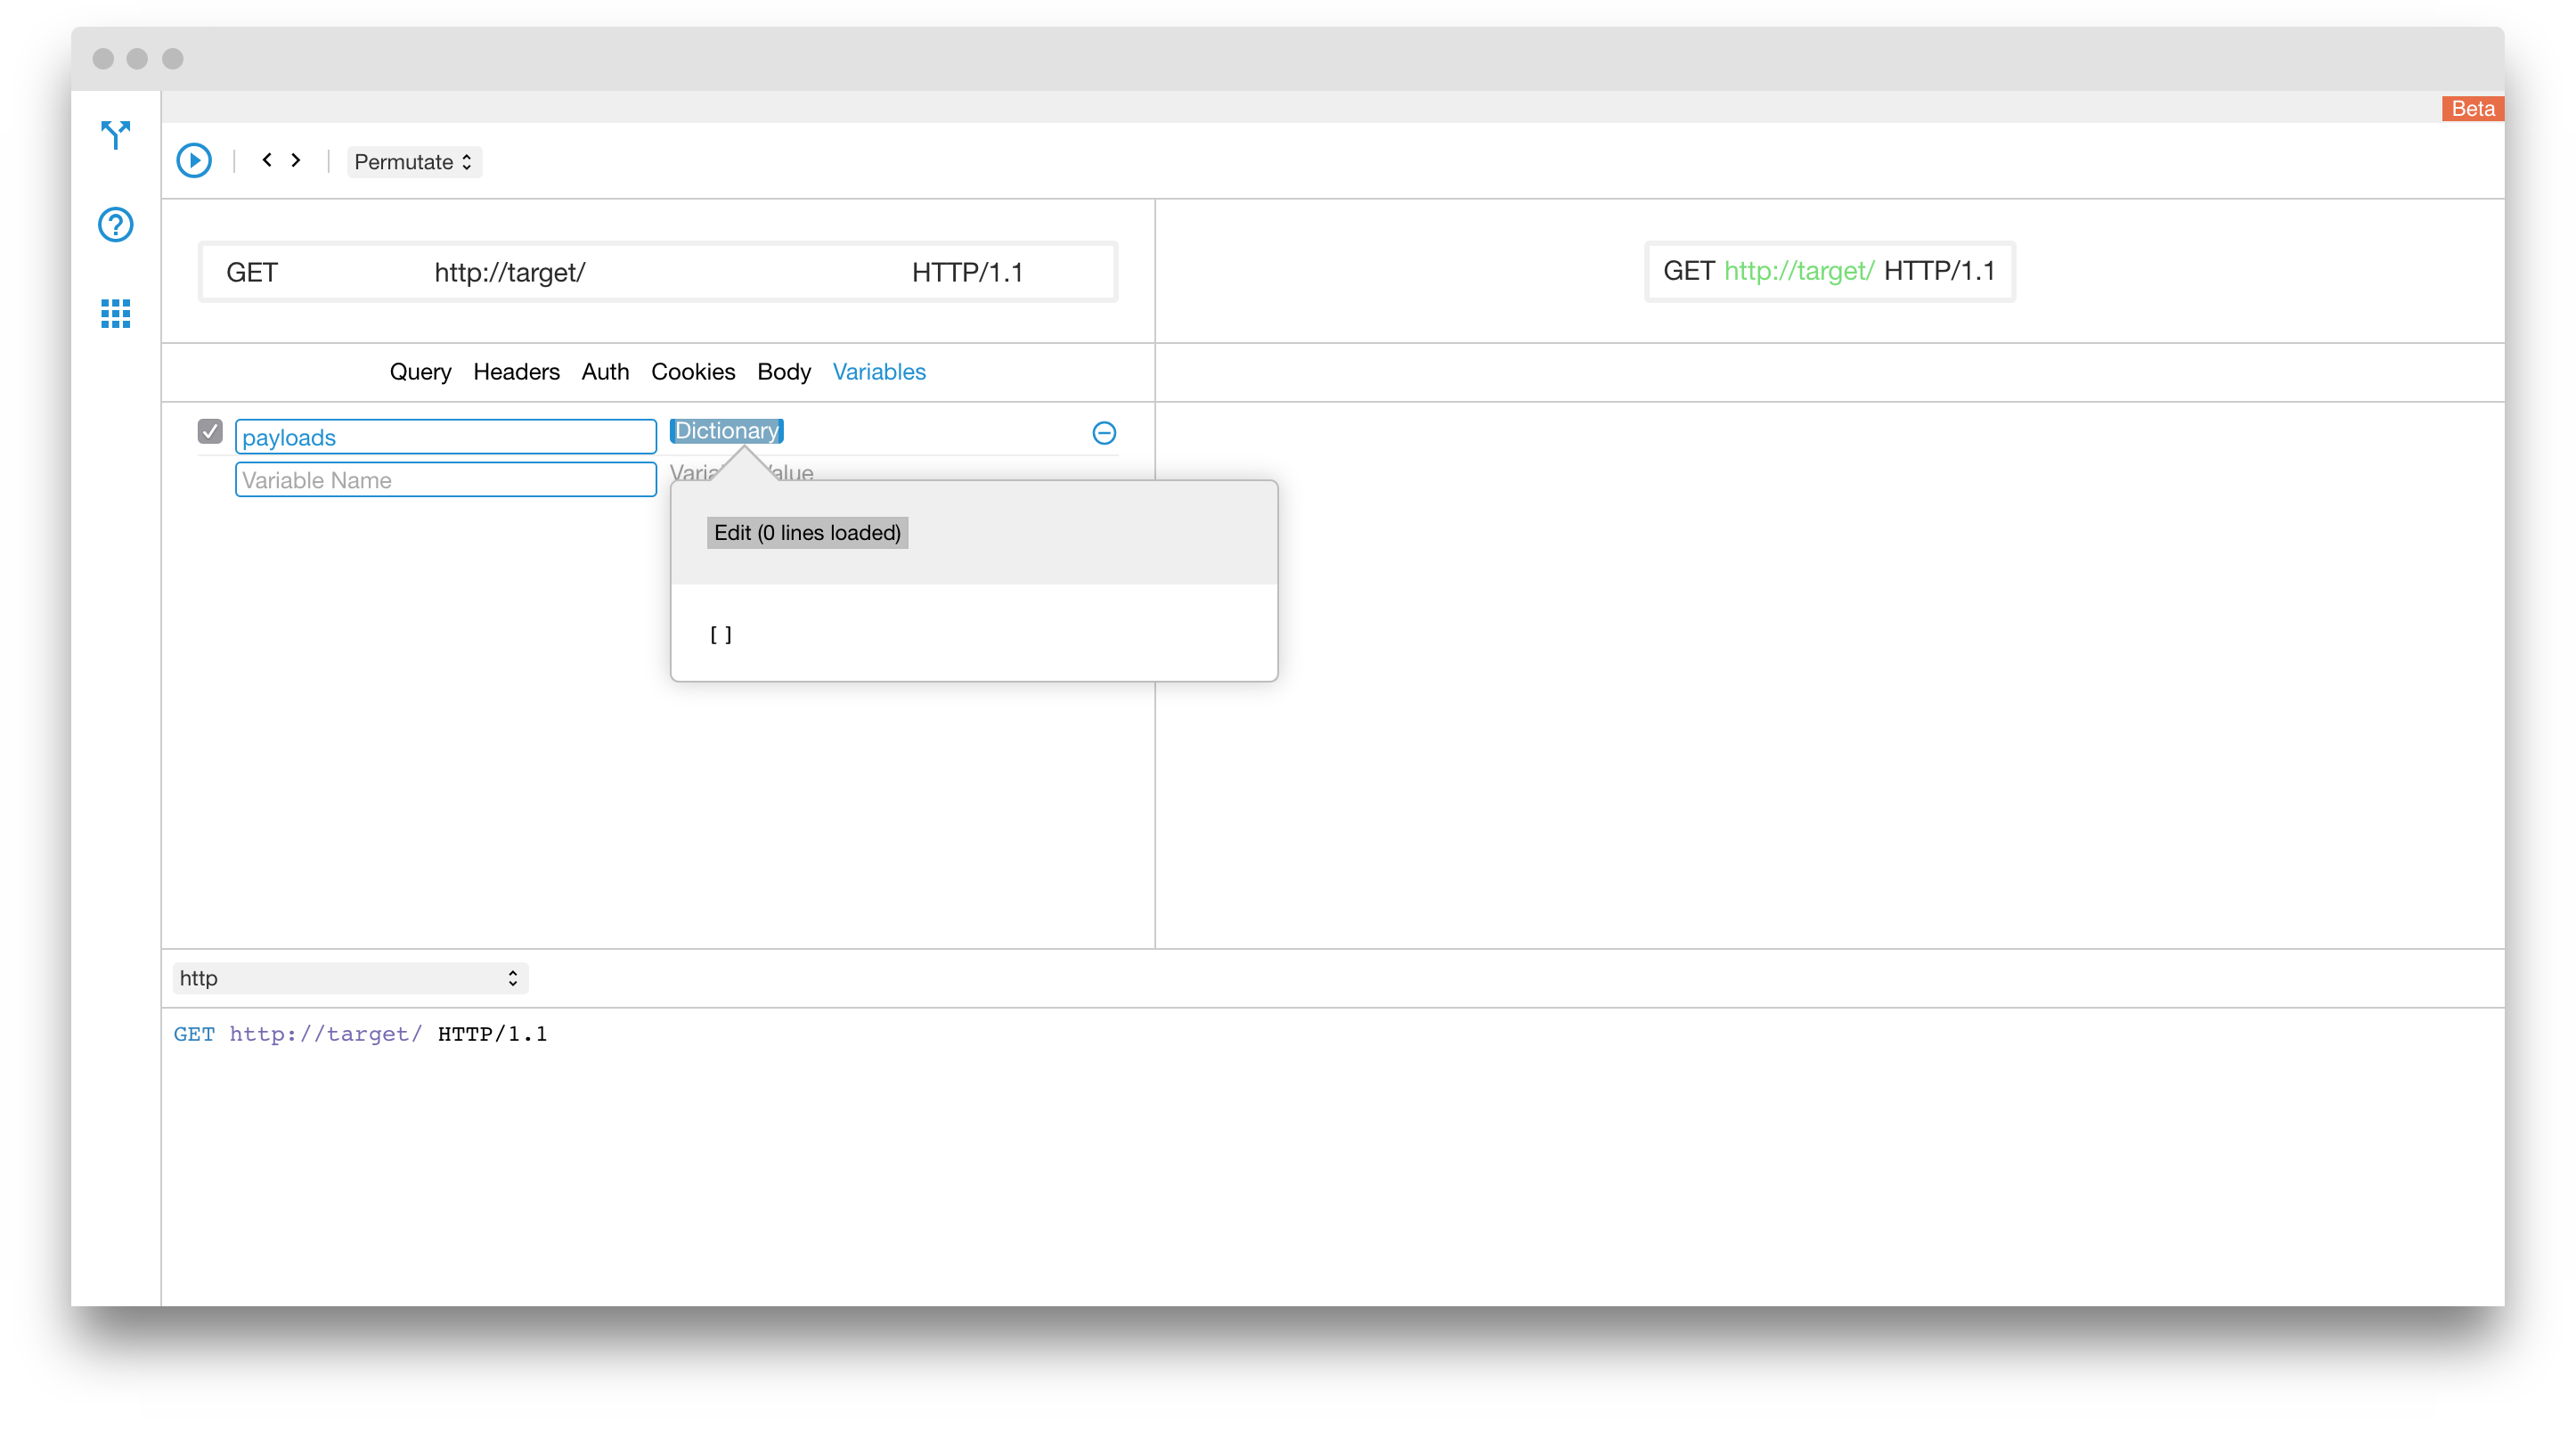
Let's create a variable that will hold our payloads first. Go to the Variables tab and type the variable name. For the value choose a Dictionary from the dropdown or just start typing dictionary until it autocompletes.
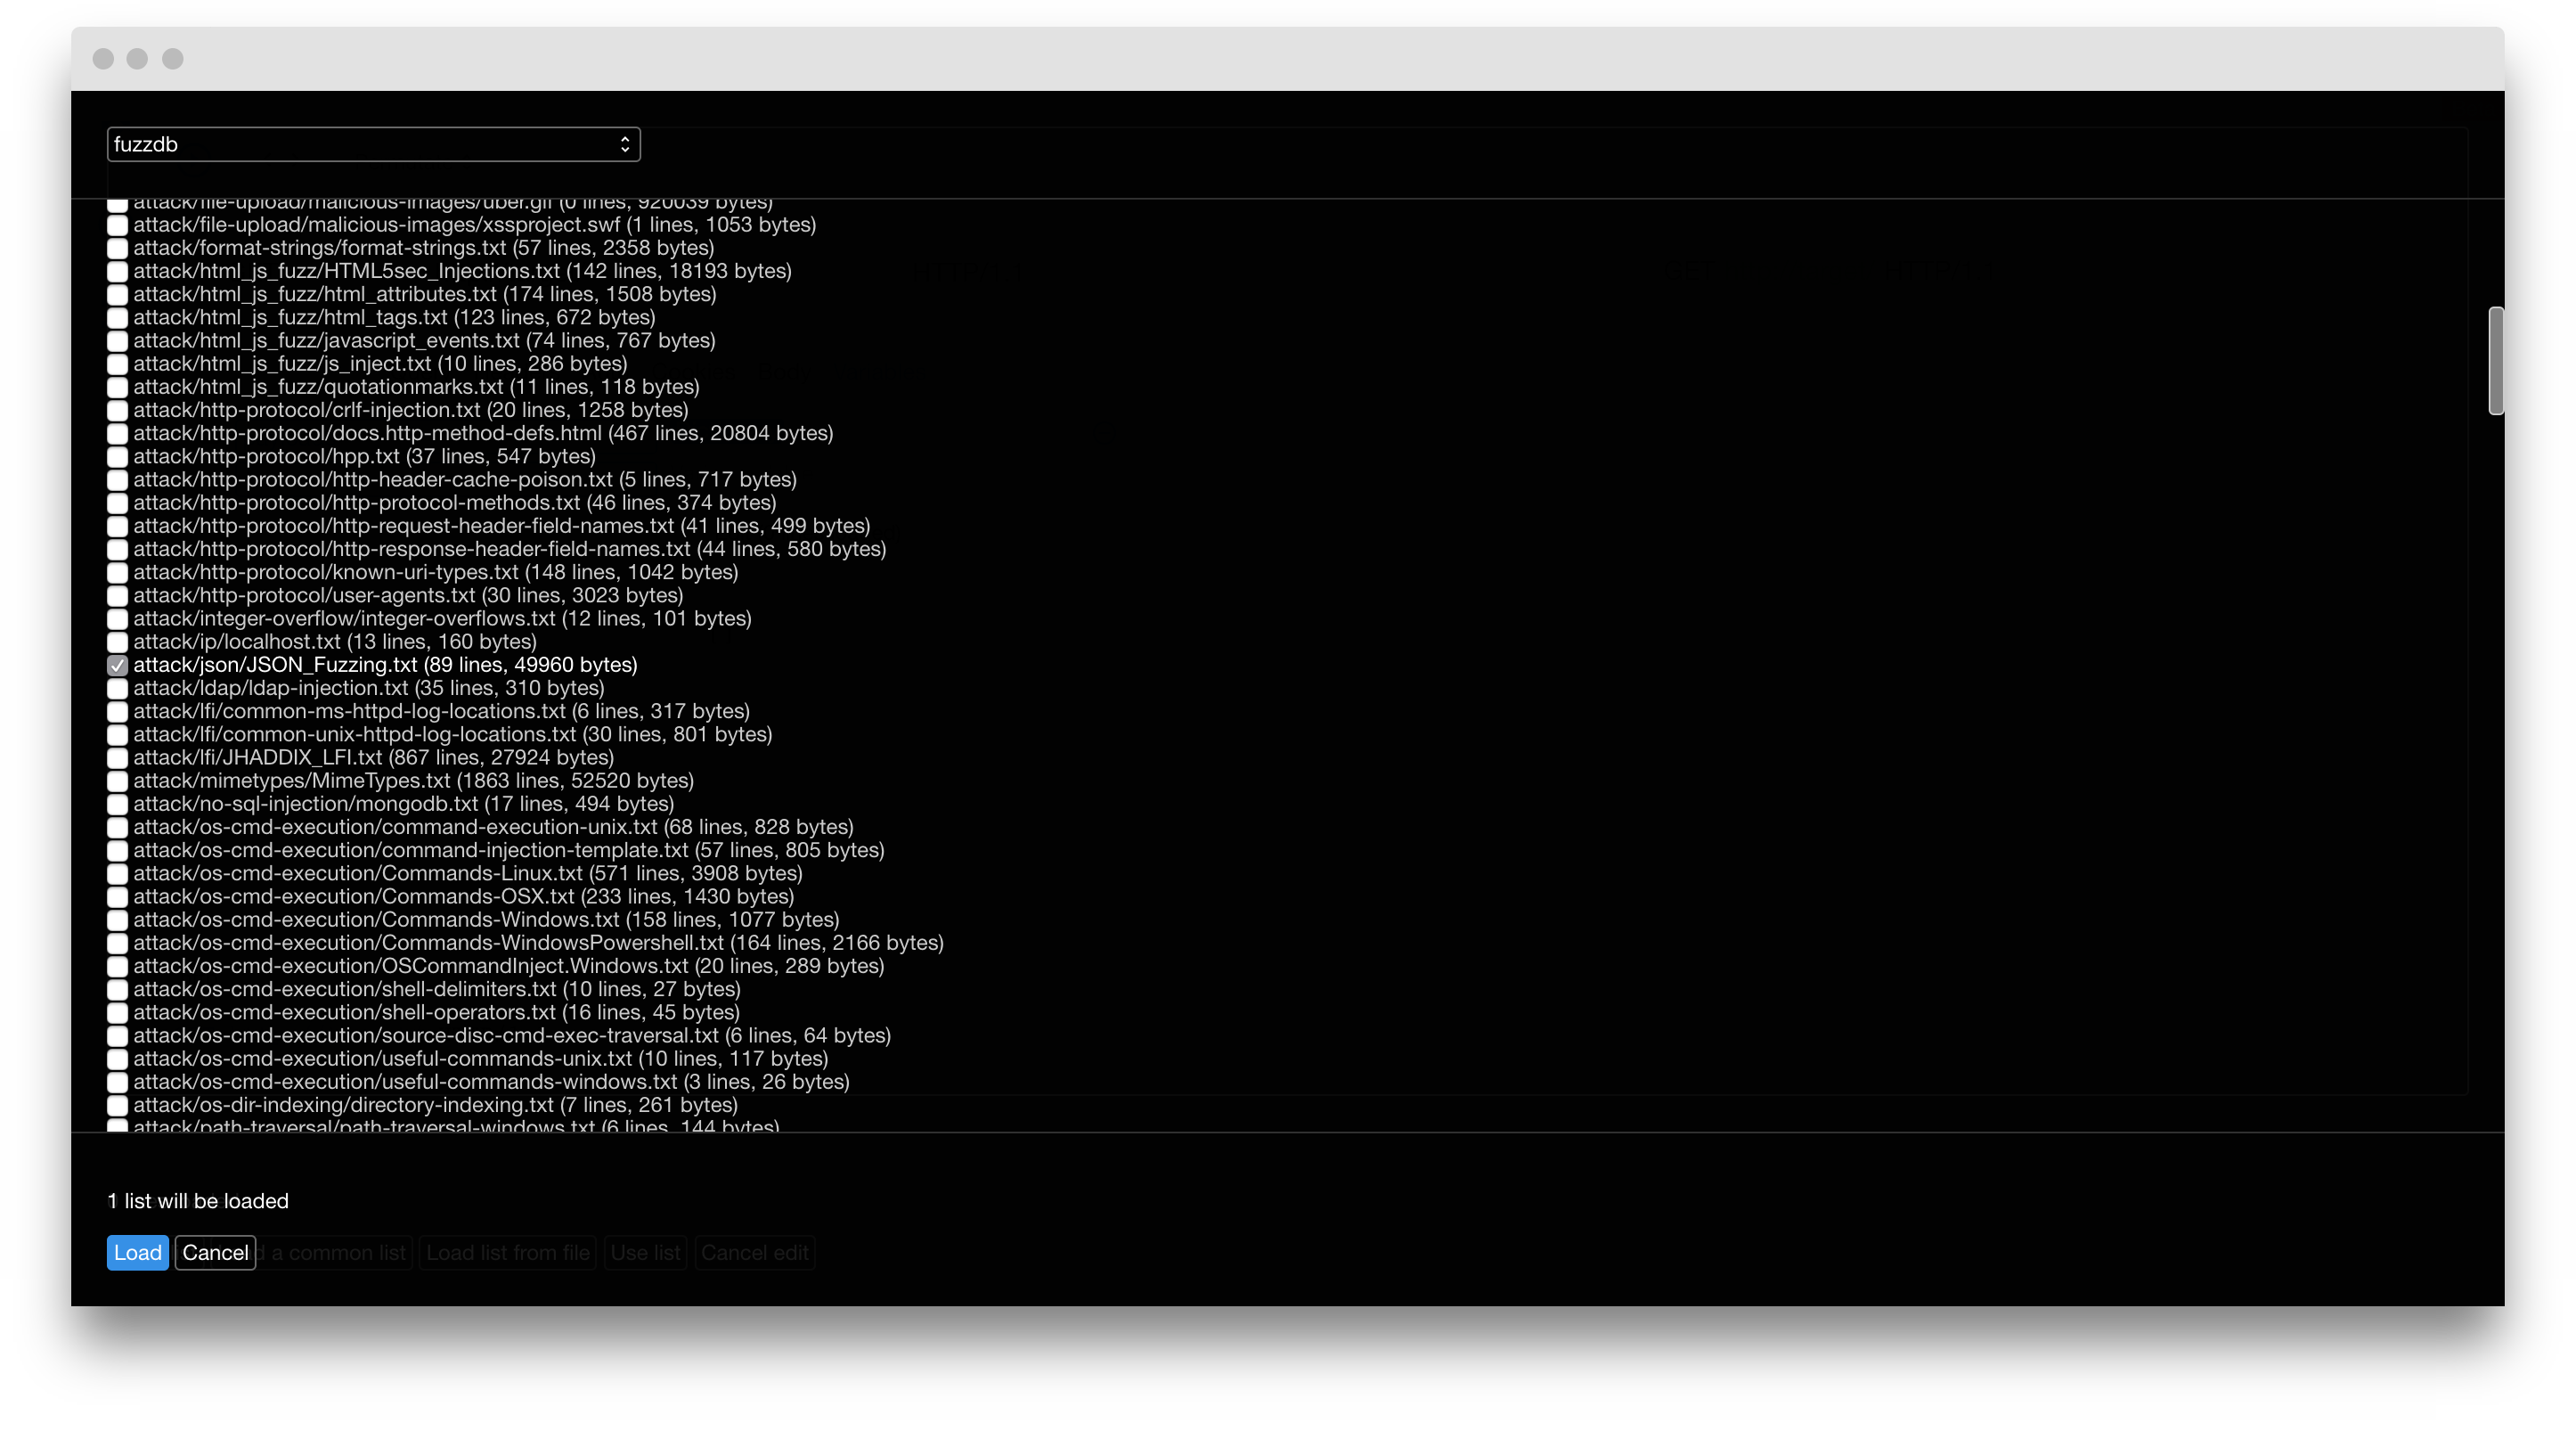
Inside the dictionary go all the way in and load the attack/json/JSON_Fuzzing.txt from FuzzDB.
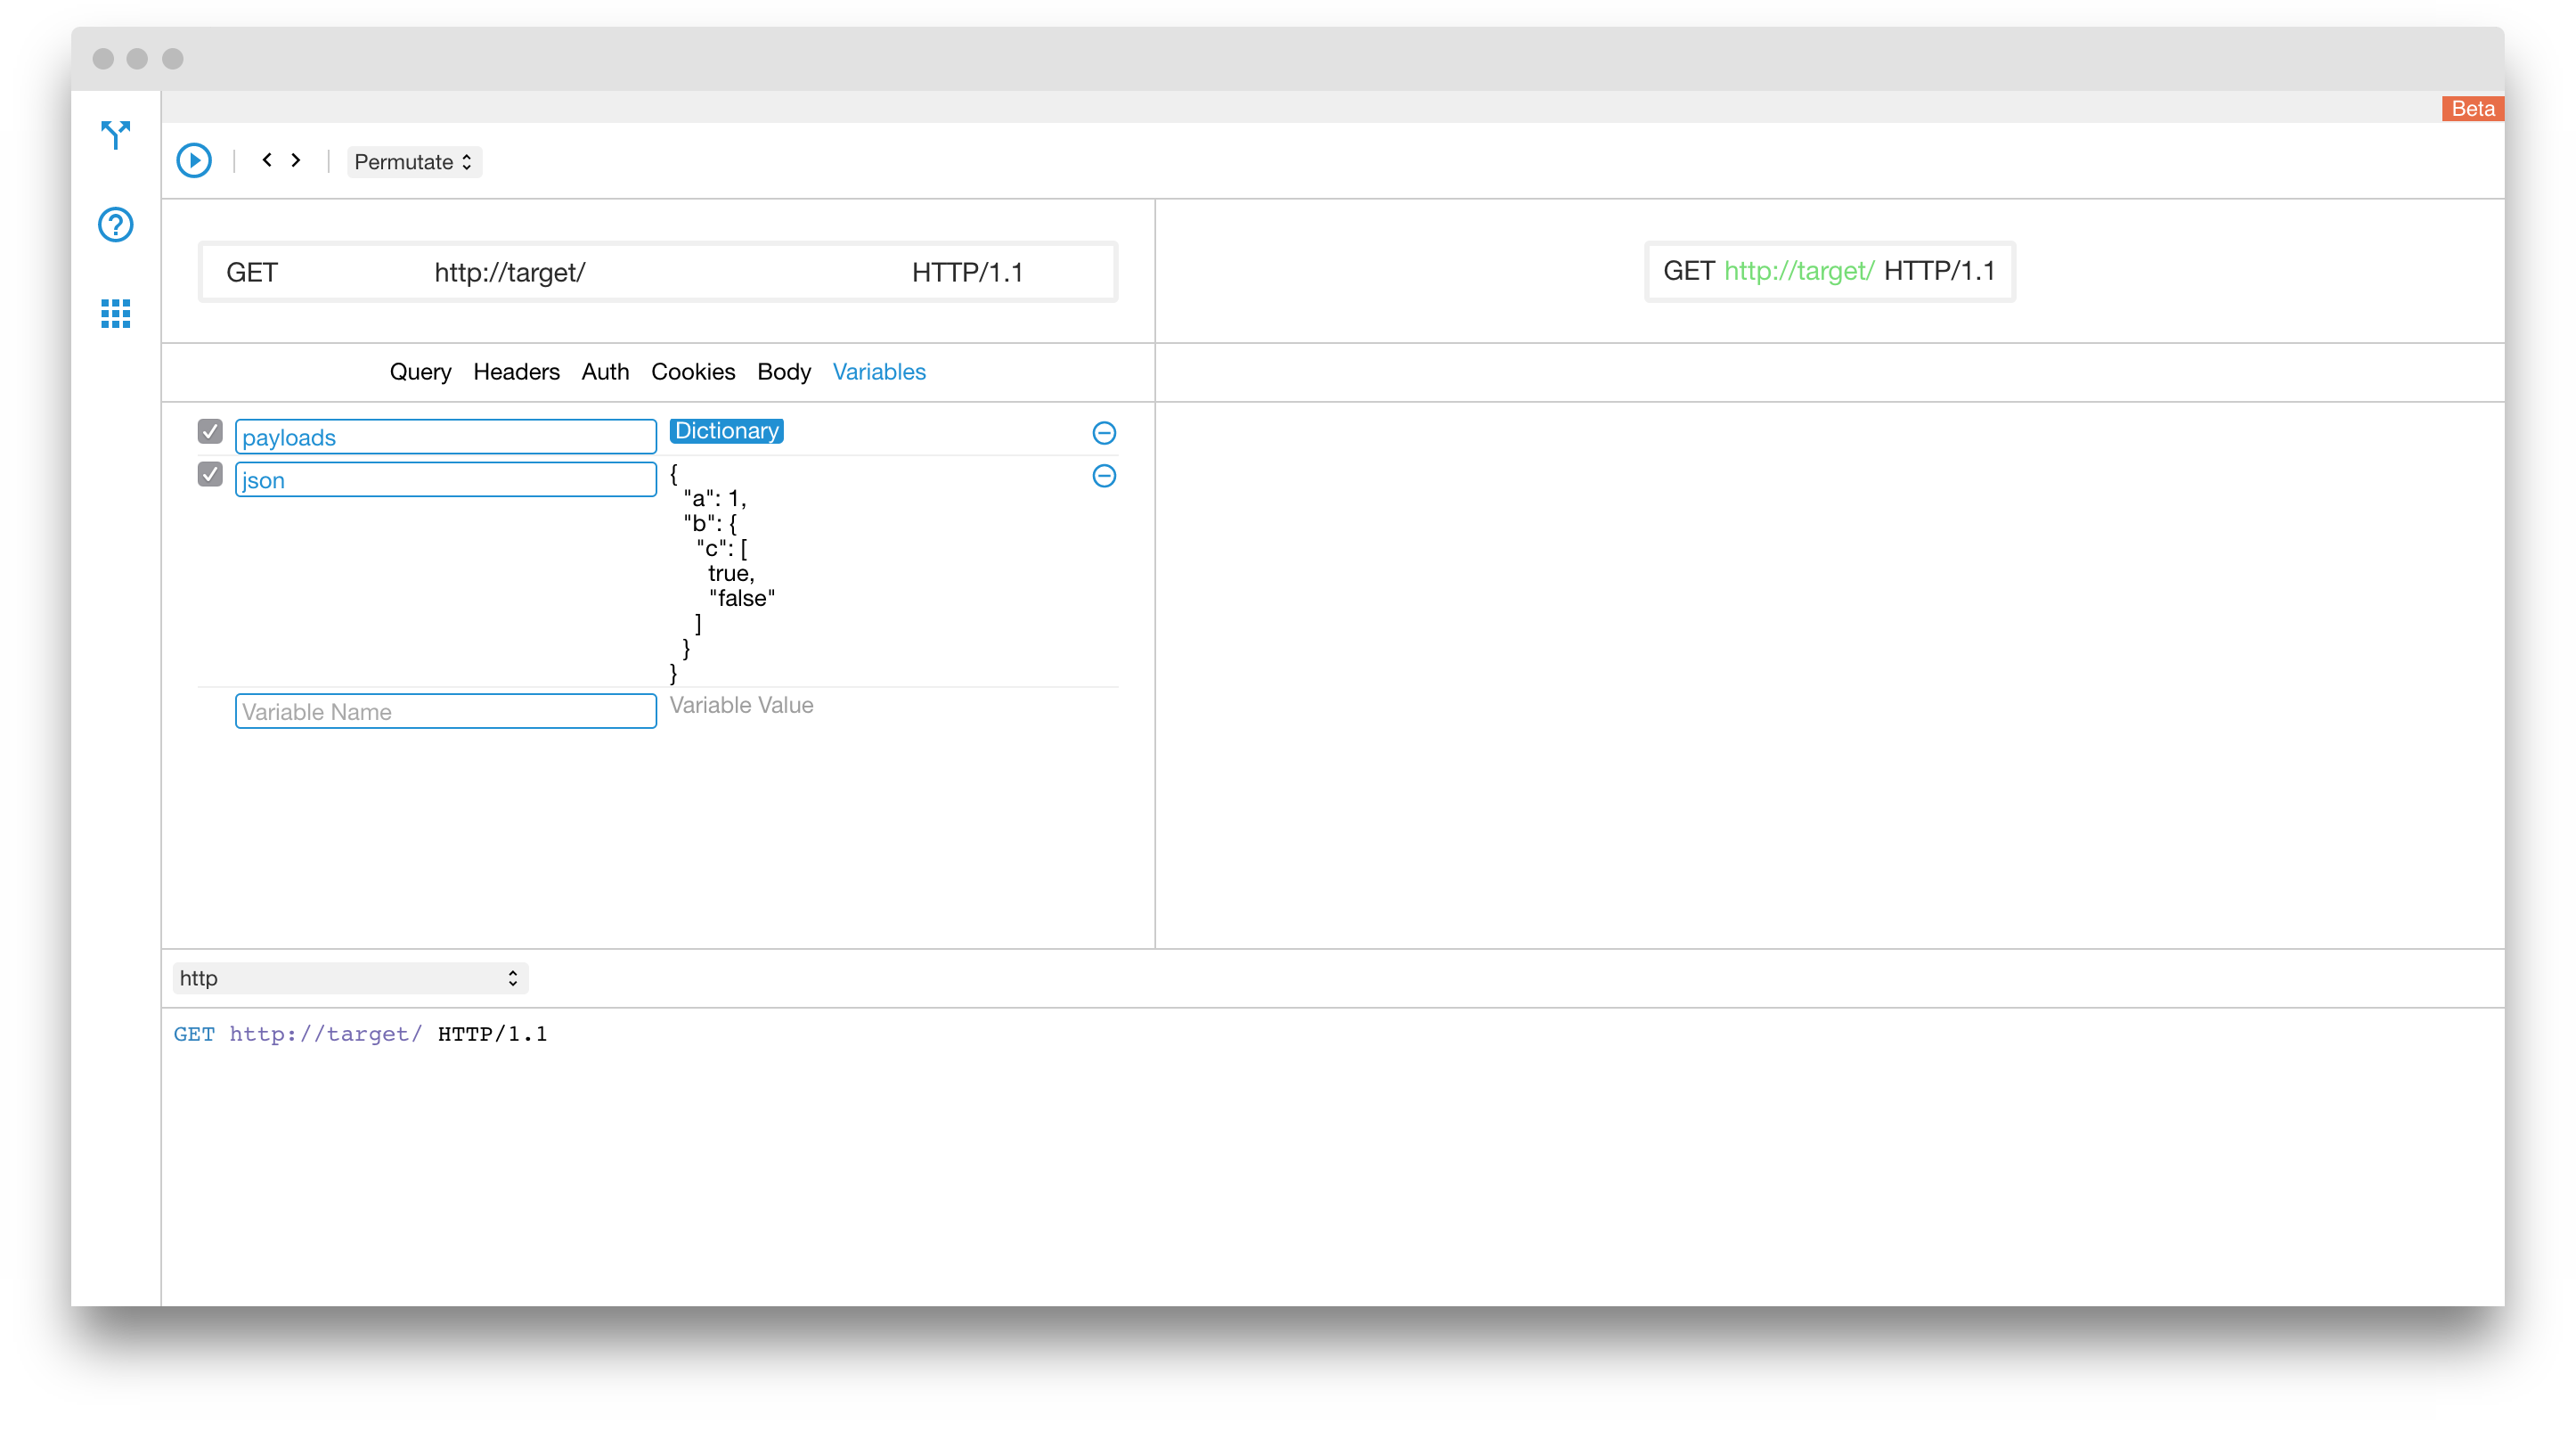
The second variable that we will setup is the actual JSON we will be fuzzing. In our example this is rather simple.
Step 2 - Create a JSON fuzz
We are not done with our variables yet. They are very useful as you can see. So let's setup the actual JSON fuzz in a variable. Select JSON Fuzz or start typing json fuzz until it autocompletes. Open it and setup our json variable as the input for the fuzz and the payloads variable for the payload.
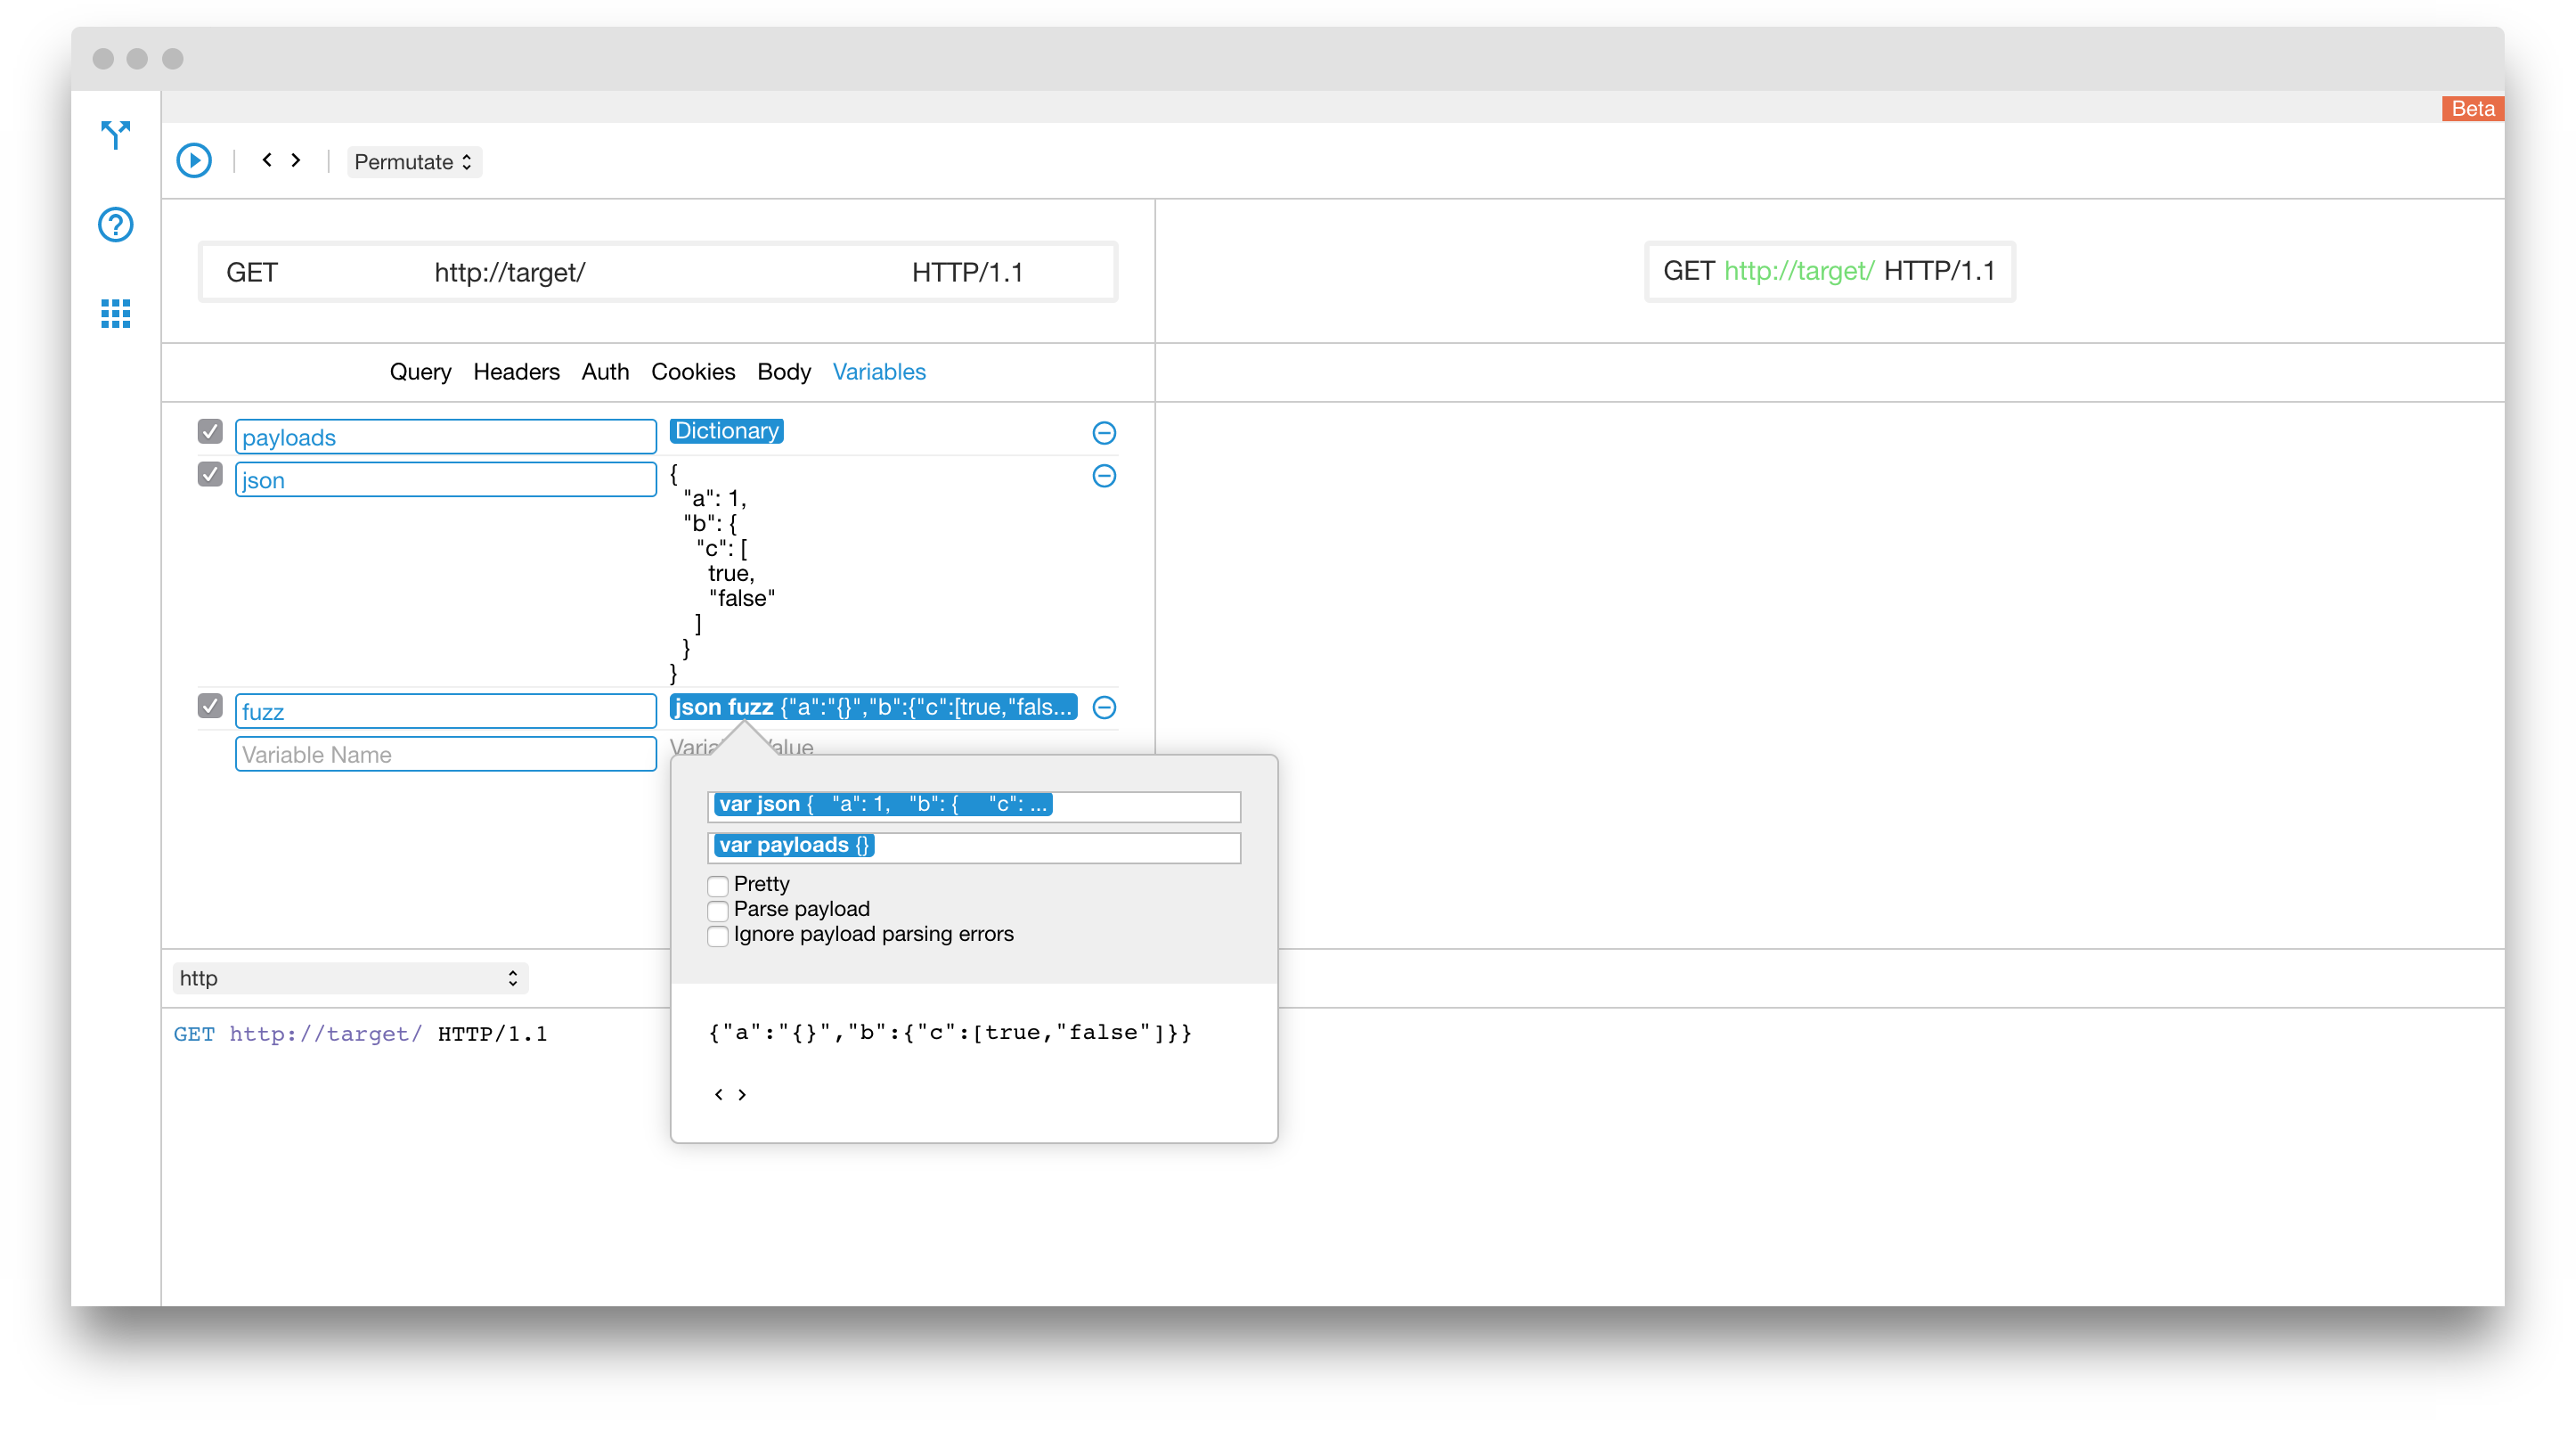
You can use the arrow buttons to see how this is going to work in practice. Notice that all values that we have loaded from the dictionary are represented as strings. This is not going to work as expected. Let's fix this by turning the Parse payload option on.
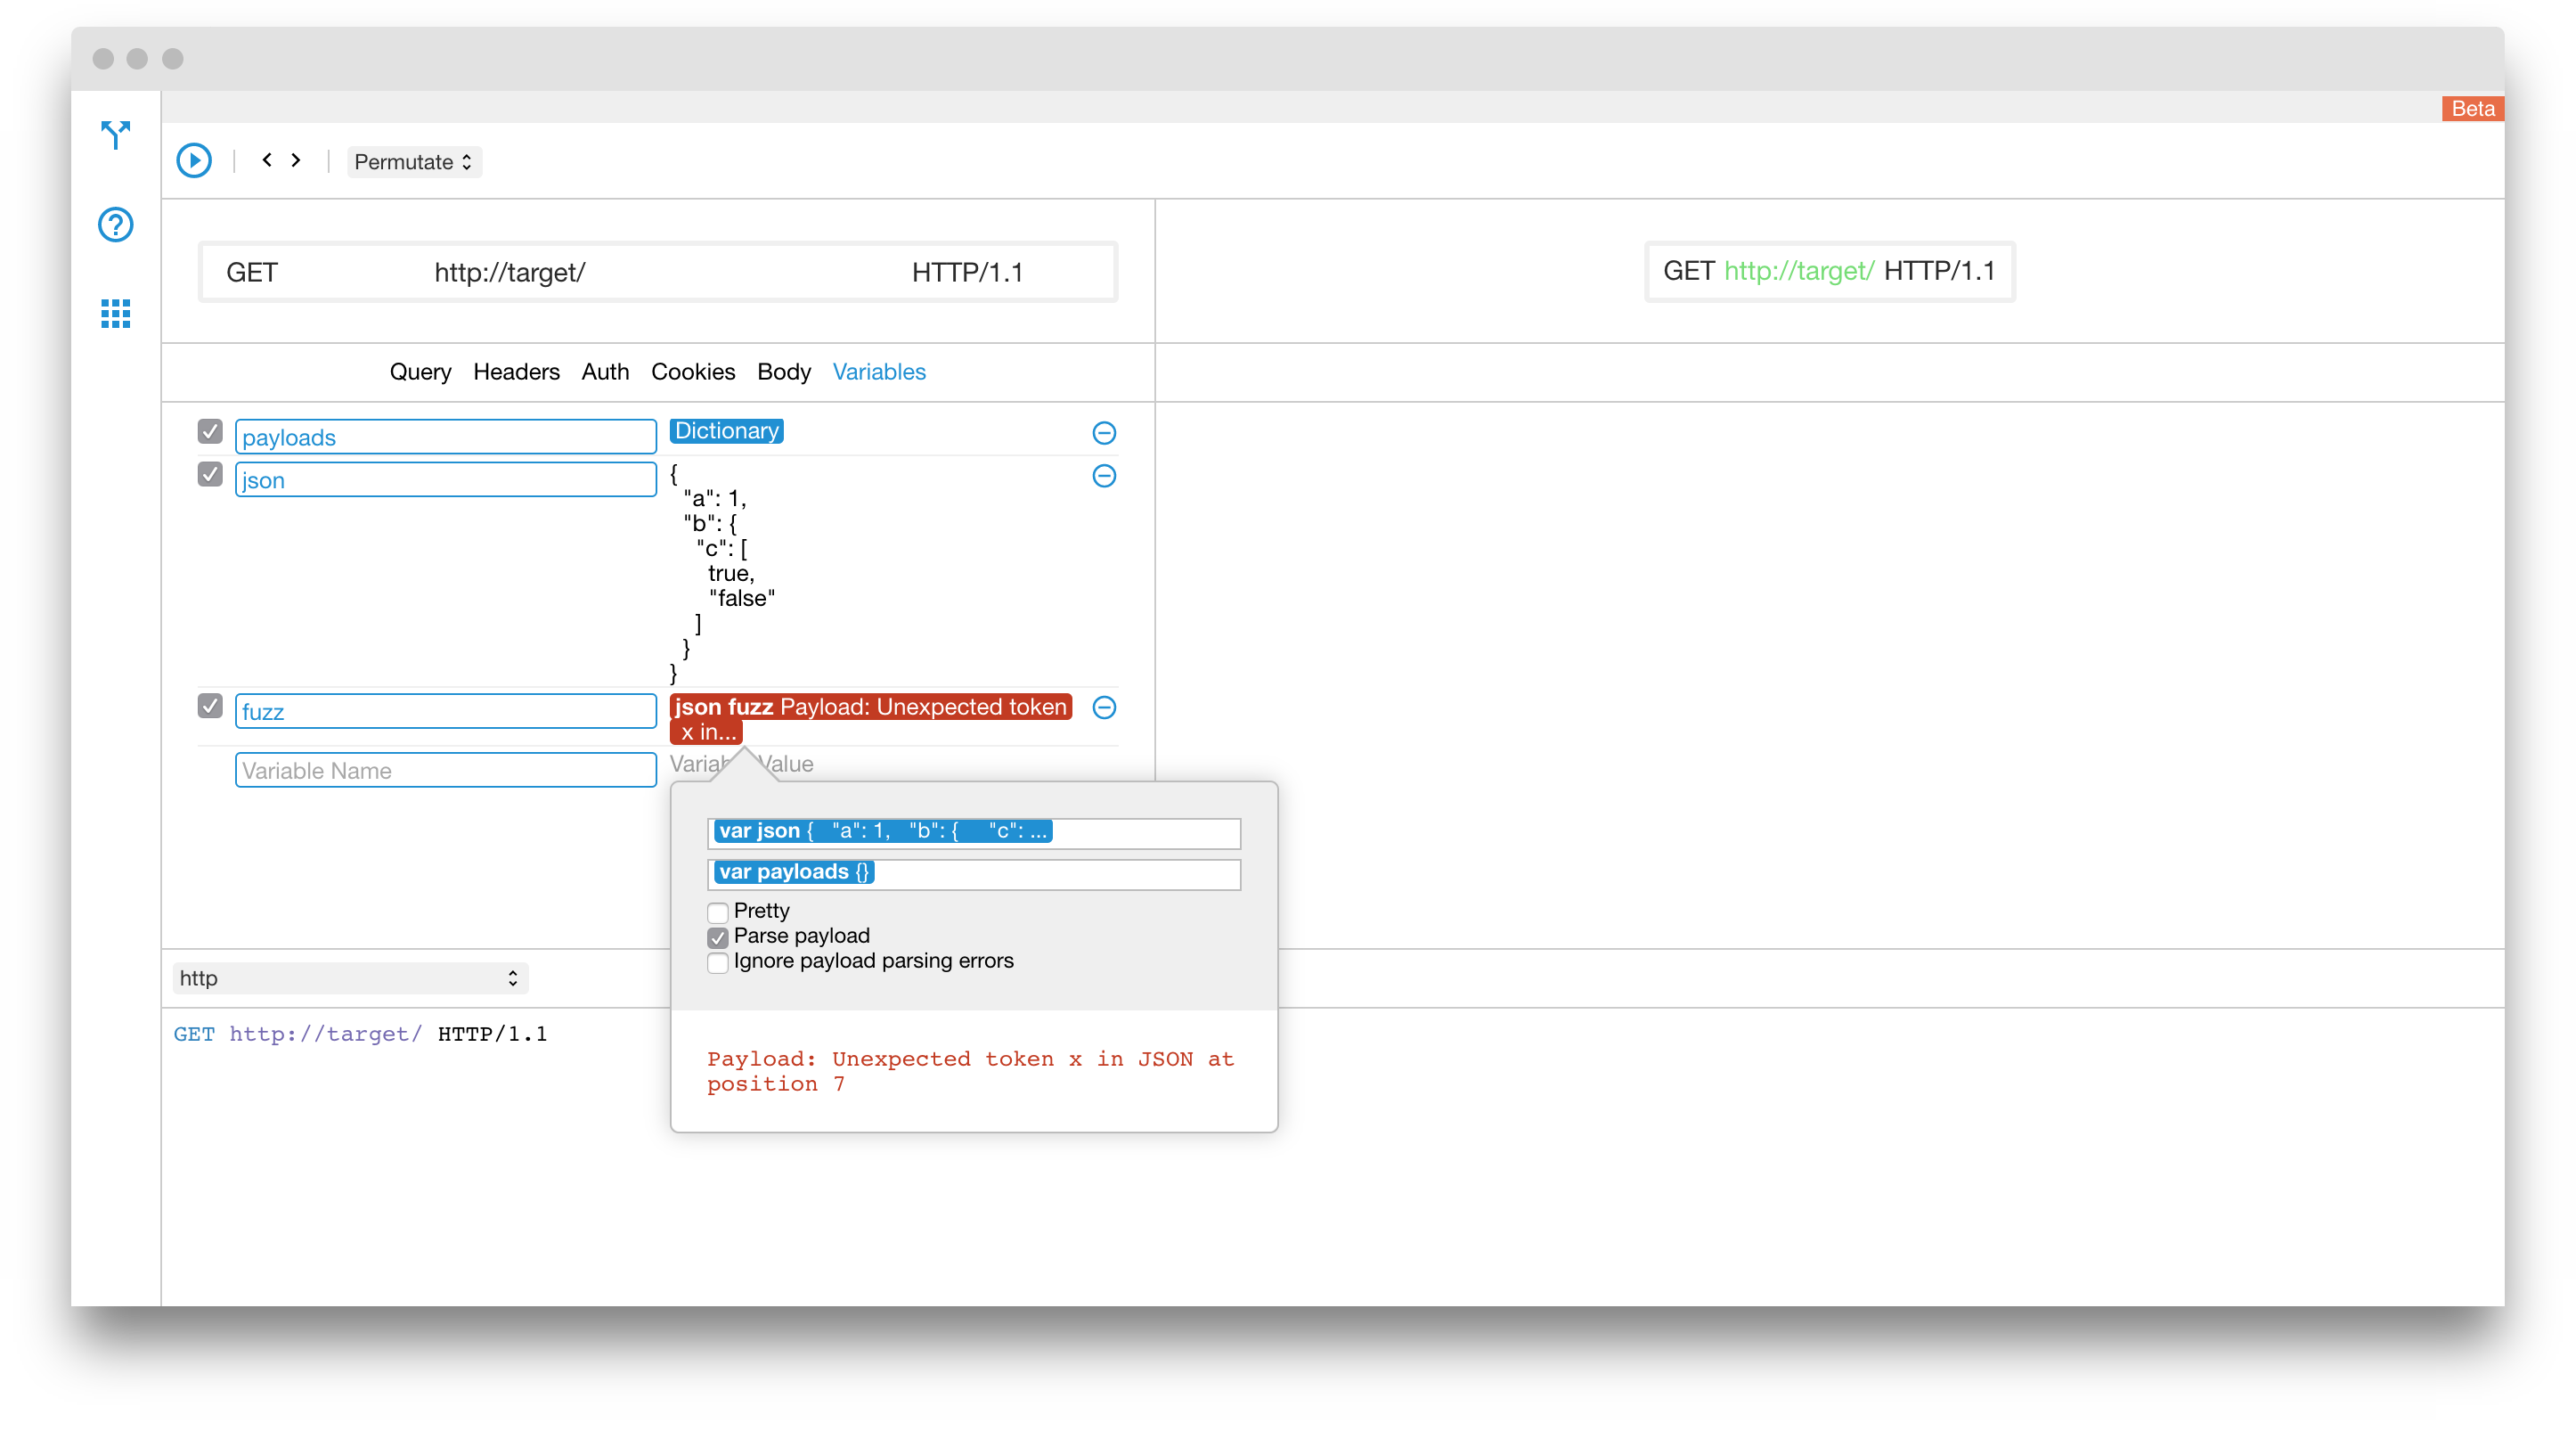
Notice that this is also not enough in this case. Some of the payloads are simply not valid JSON parsable documents at all so we either need to remove them from the dictionary, fix them with another transform such as Replace, or by clicking on the Ignore payload parsing errors option. We will use the later.
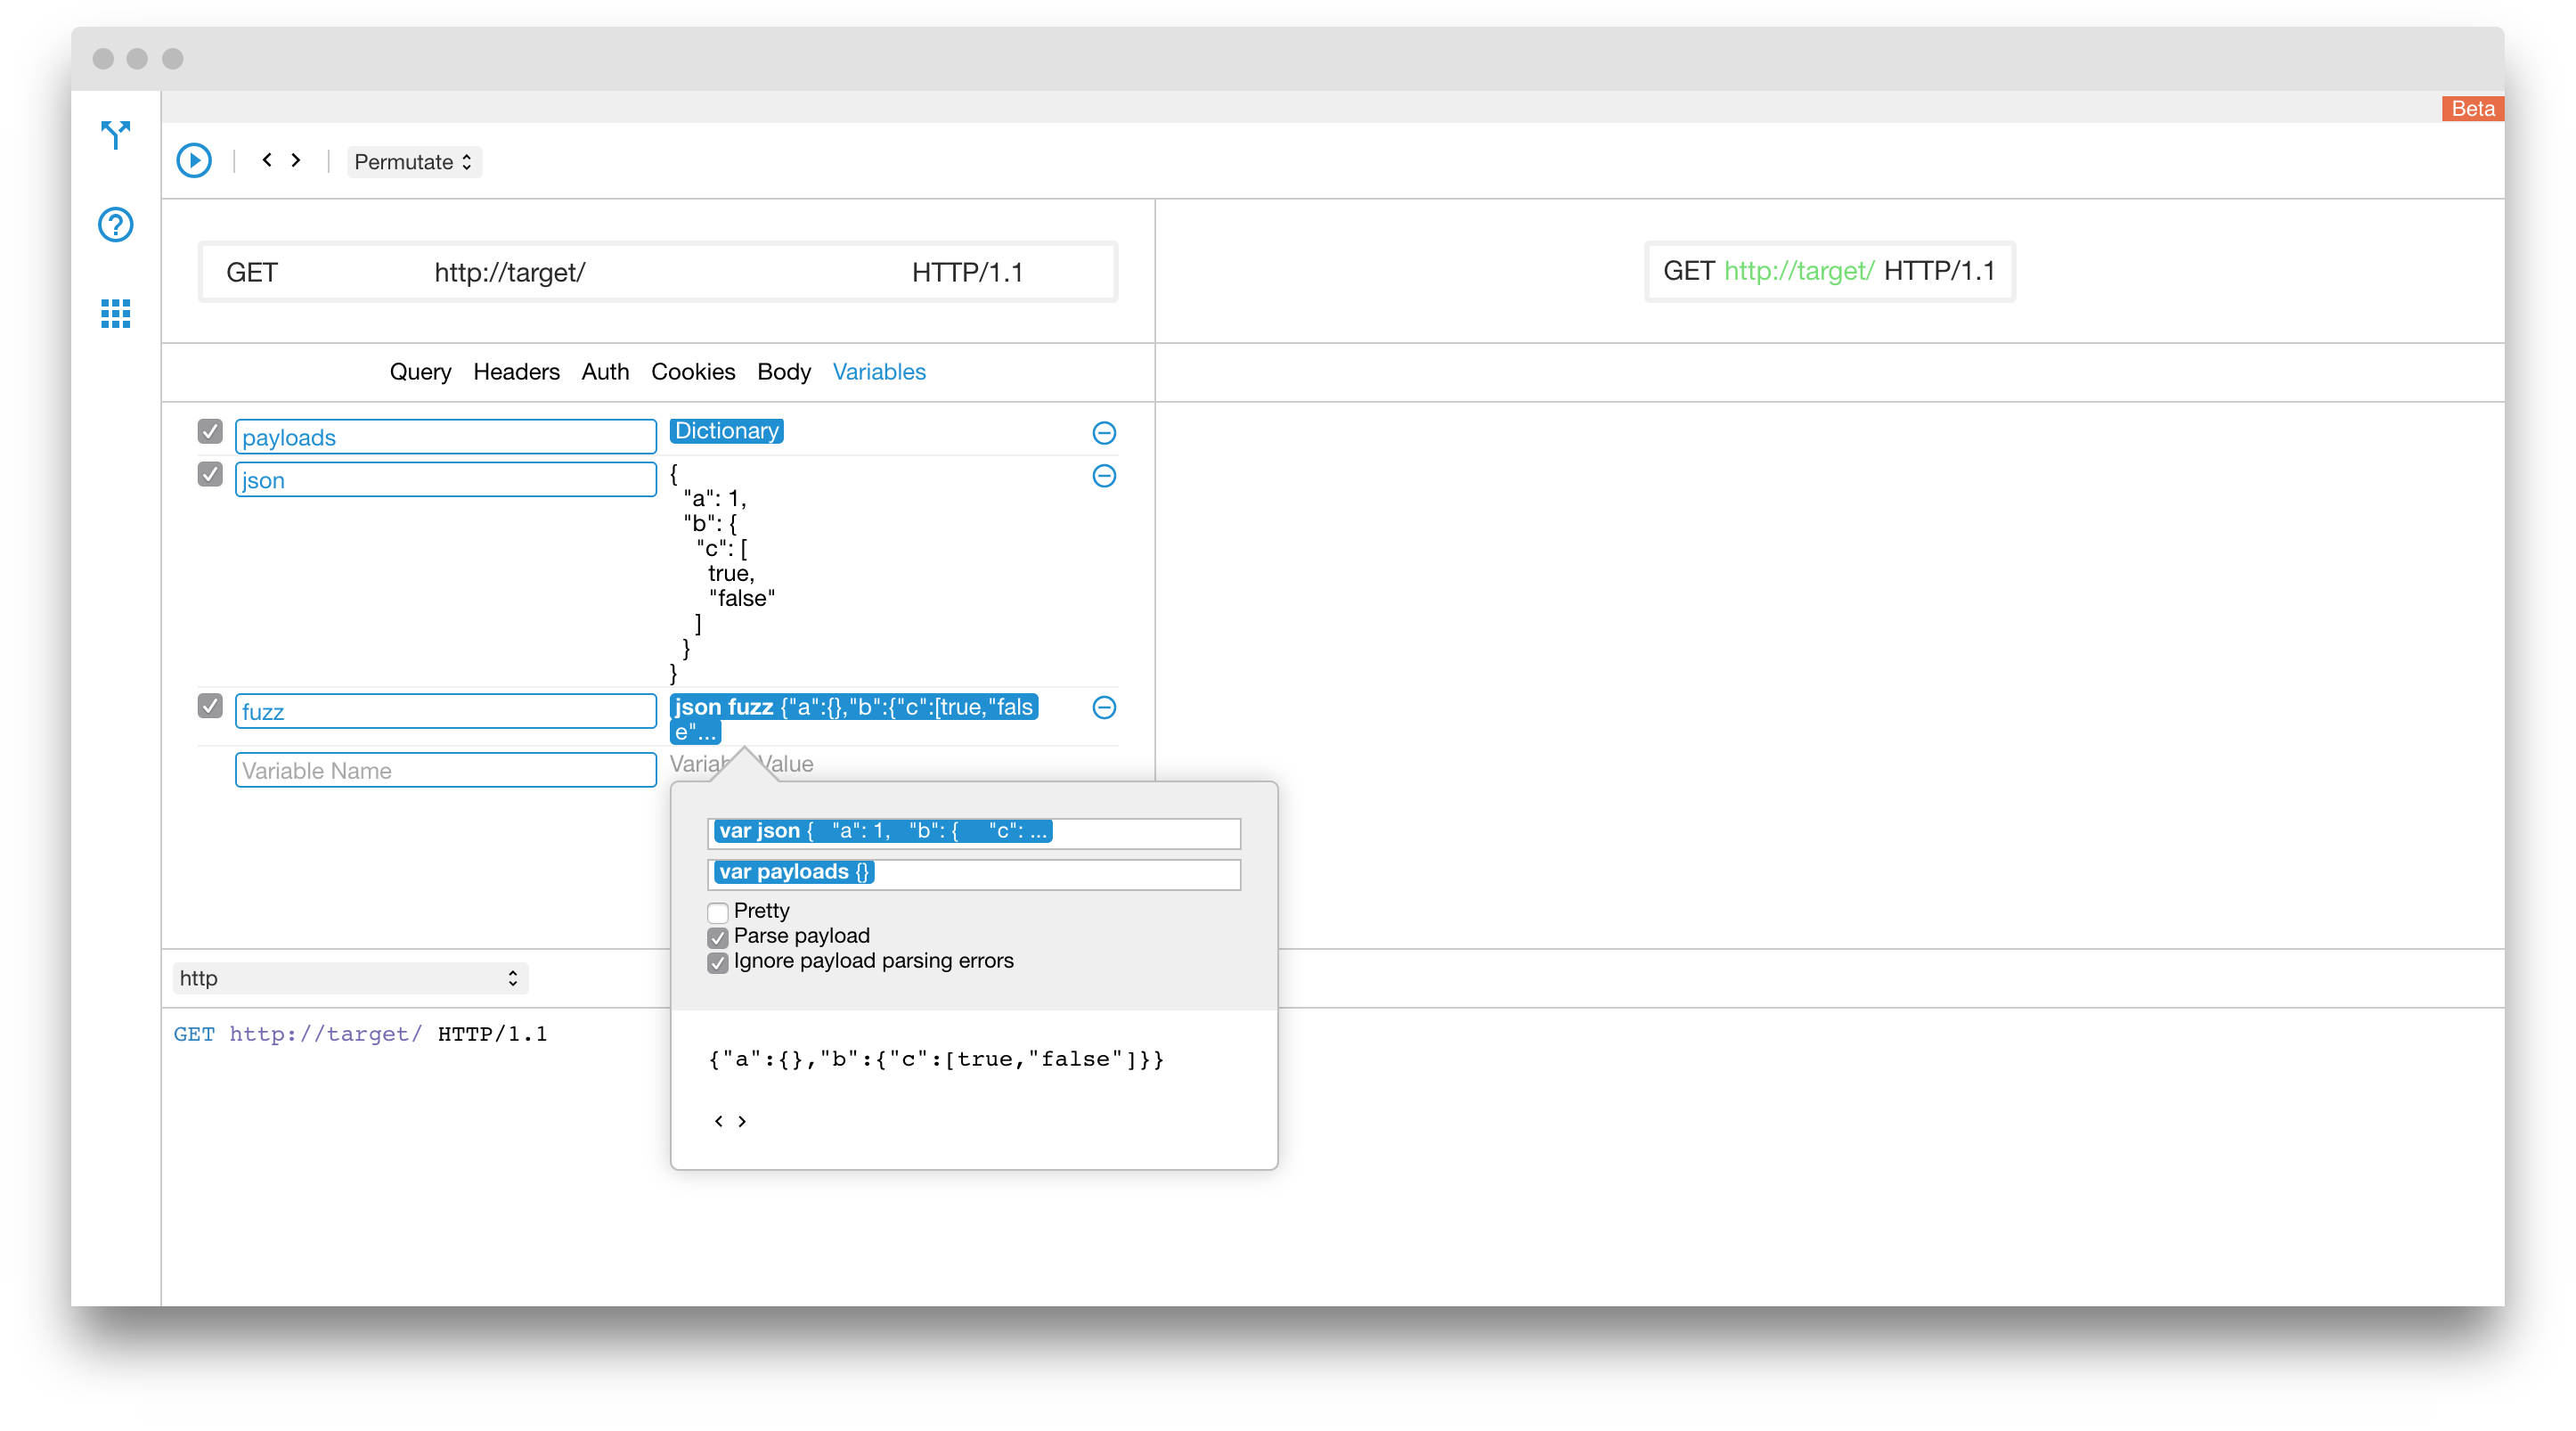
Now use the arrow buttons to preview the results. As you can see everything works as expected more or less.
Step 3 - Setup the request
Since we did all the hard work inside the variables tab, the rest is just configuring the request to point out to the correct variable. In this example we will be sending the generated JSON documents as POST - imagine we are doing an API fuzz-test.
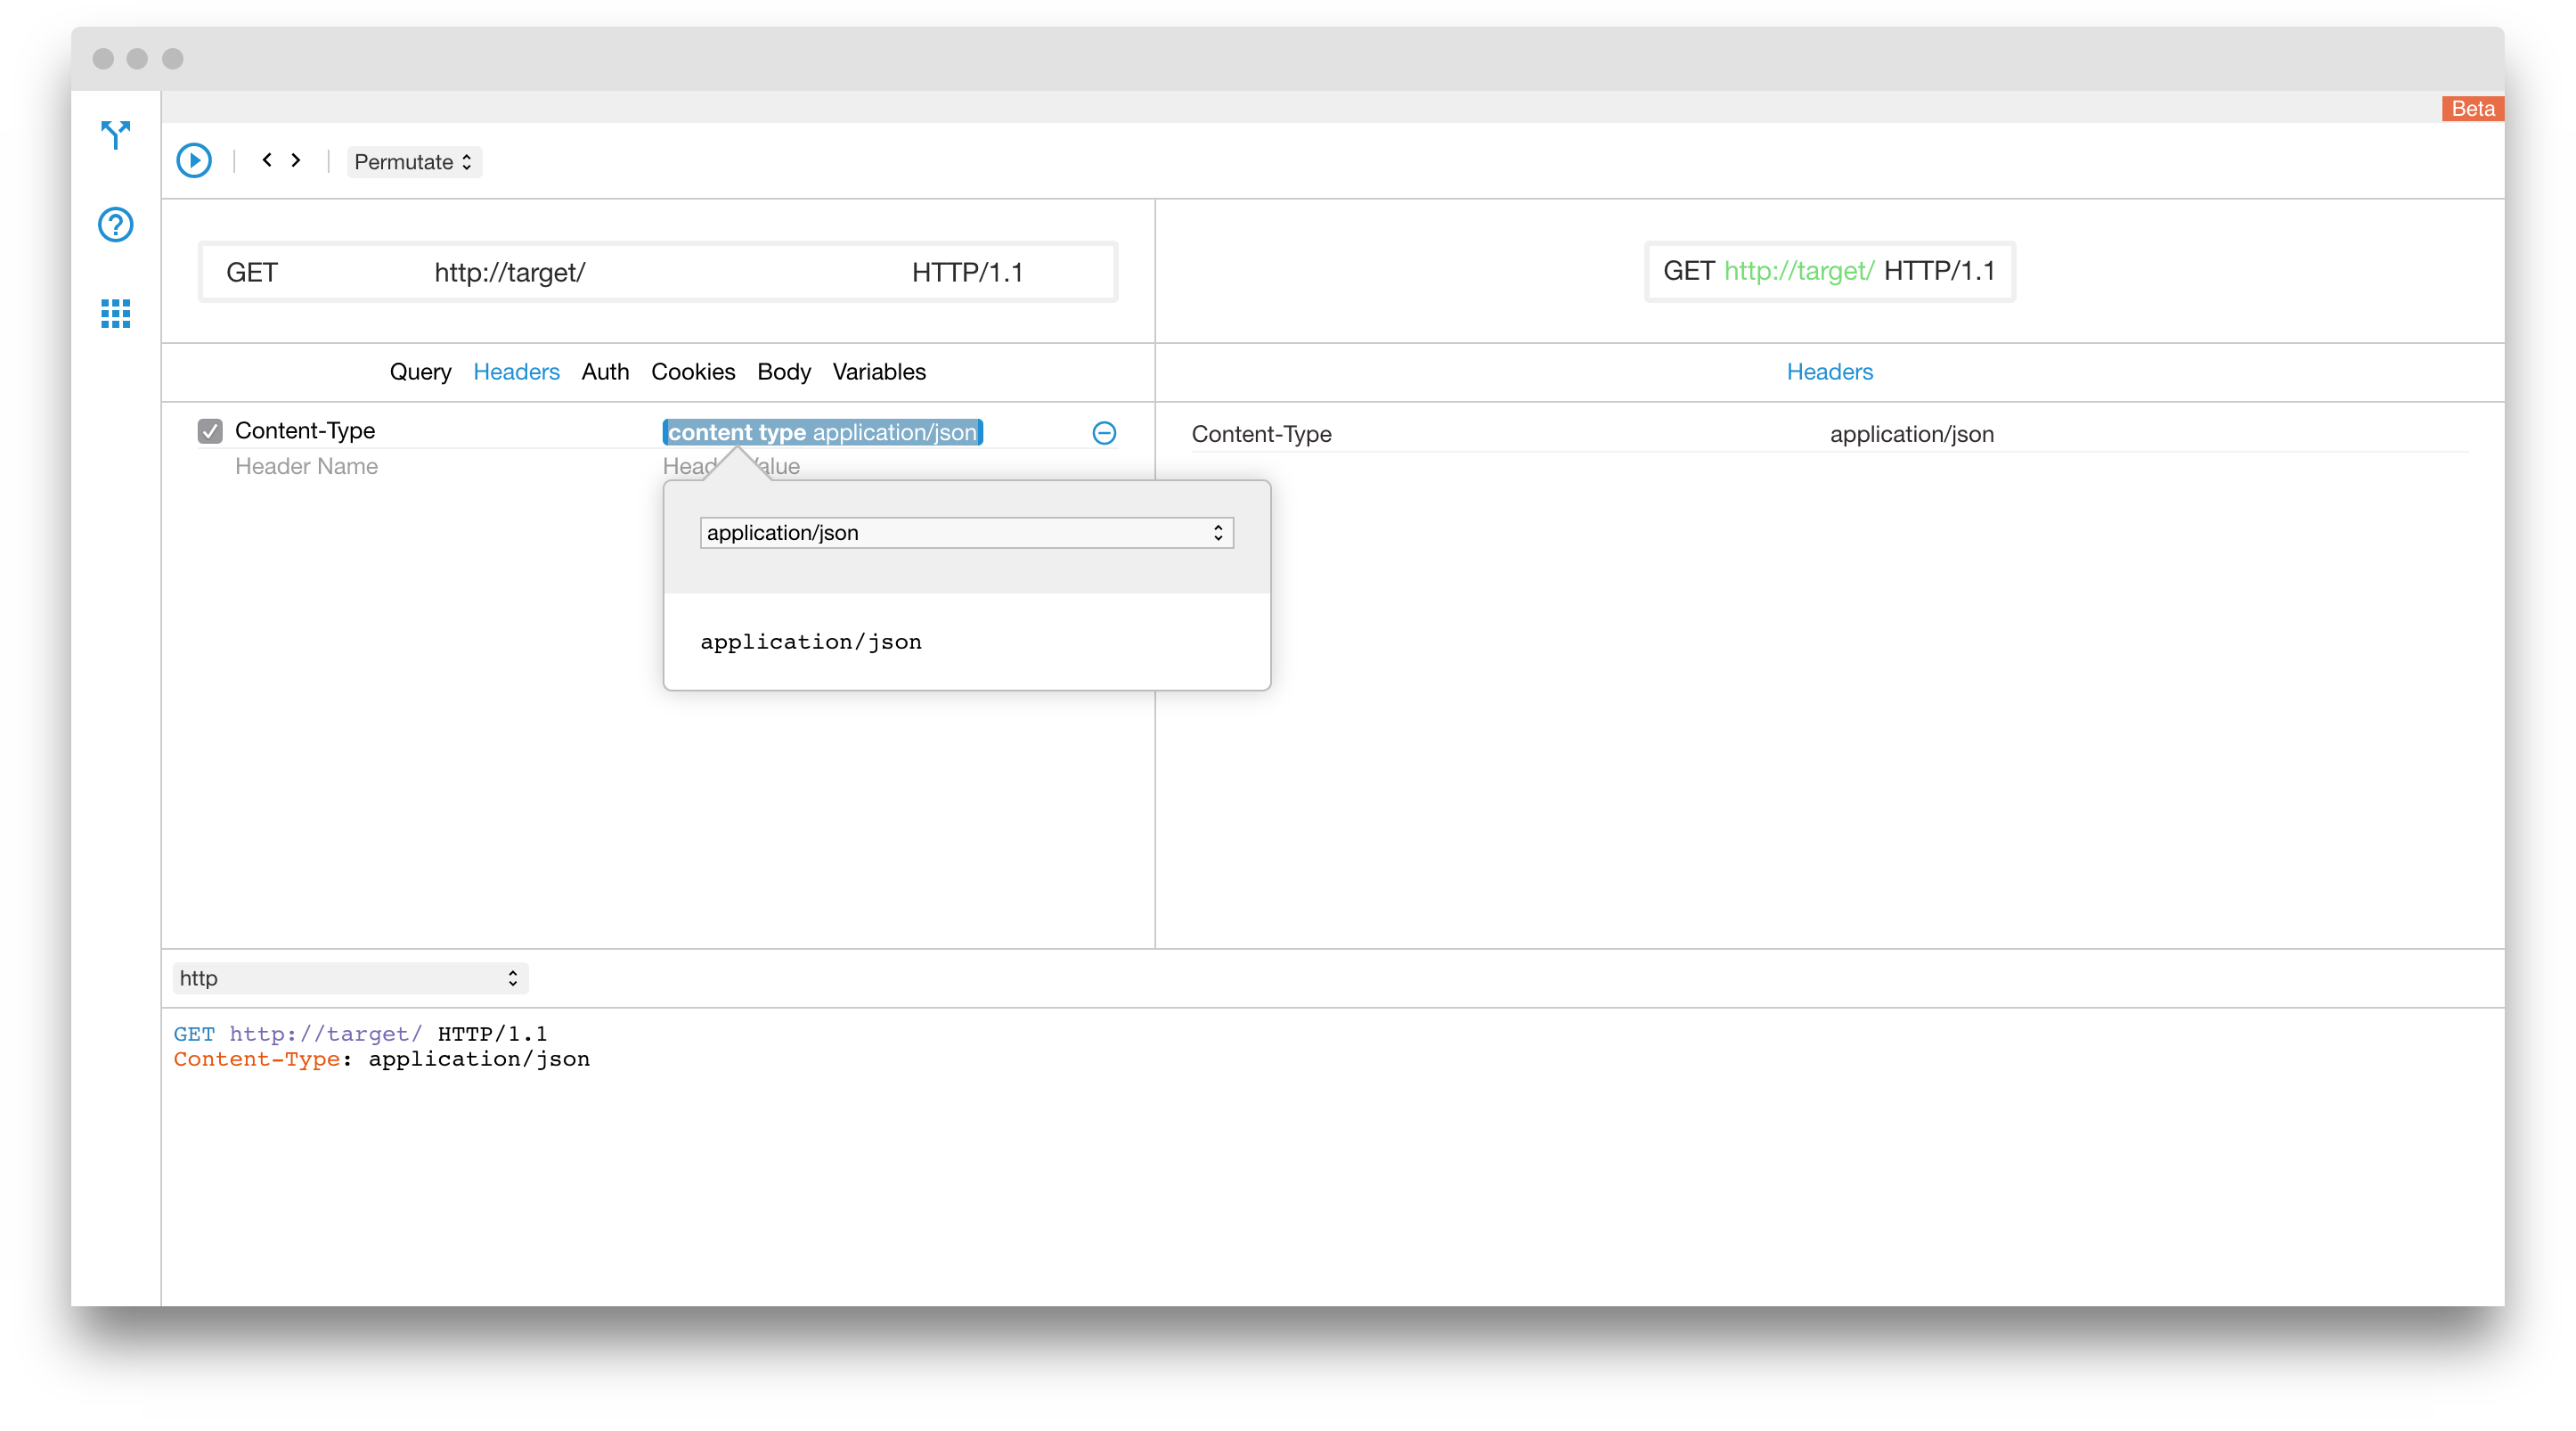
Let's setup the content type. Go to the headers tab and type Content-Type for the header name. For the header value we can just type application/json or we also can use the Content Type Header block which allow us to select the correct content type from a dropdown list.
Next we need to setup the body. Go to the Body tab and select text/plain from the dropdown. Inside the text just include the fuzz variable.
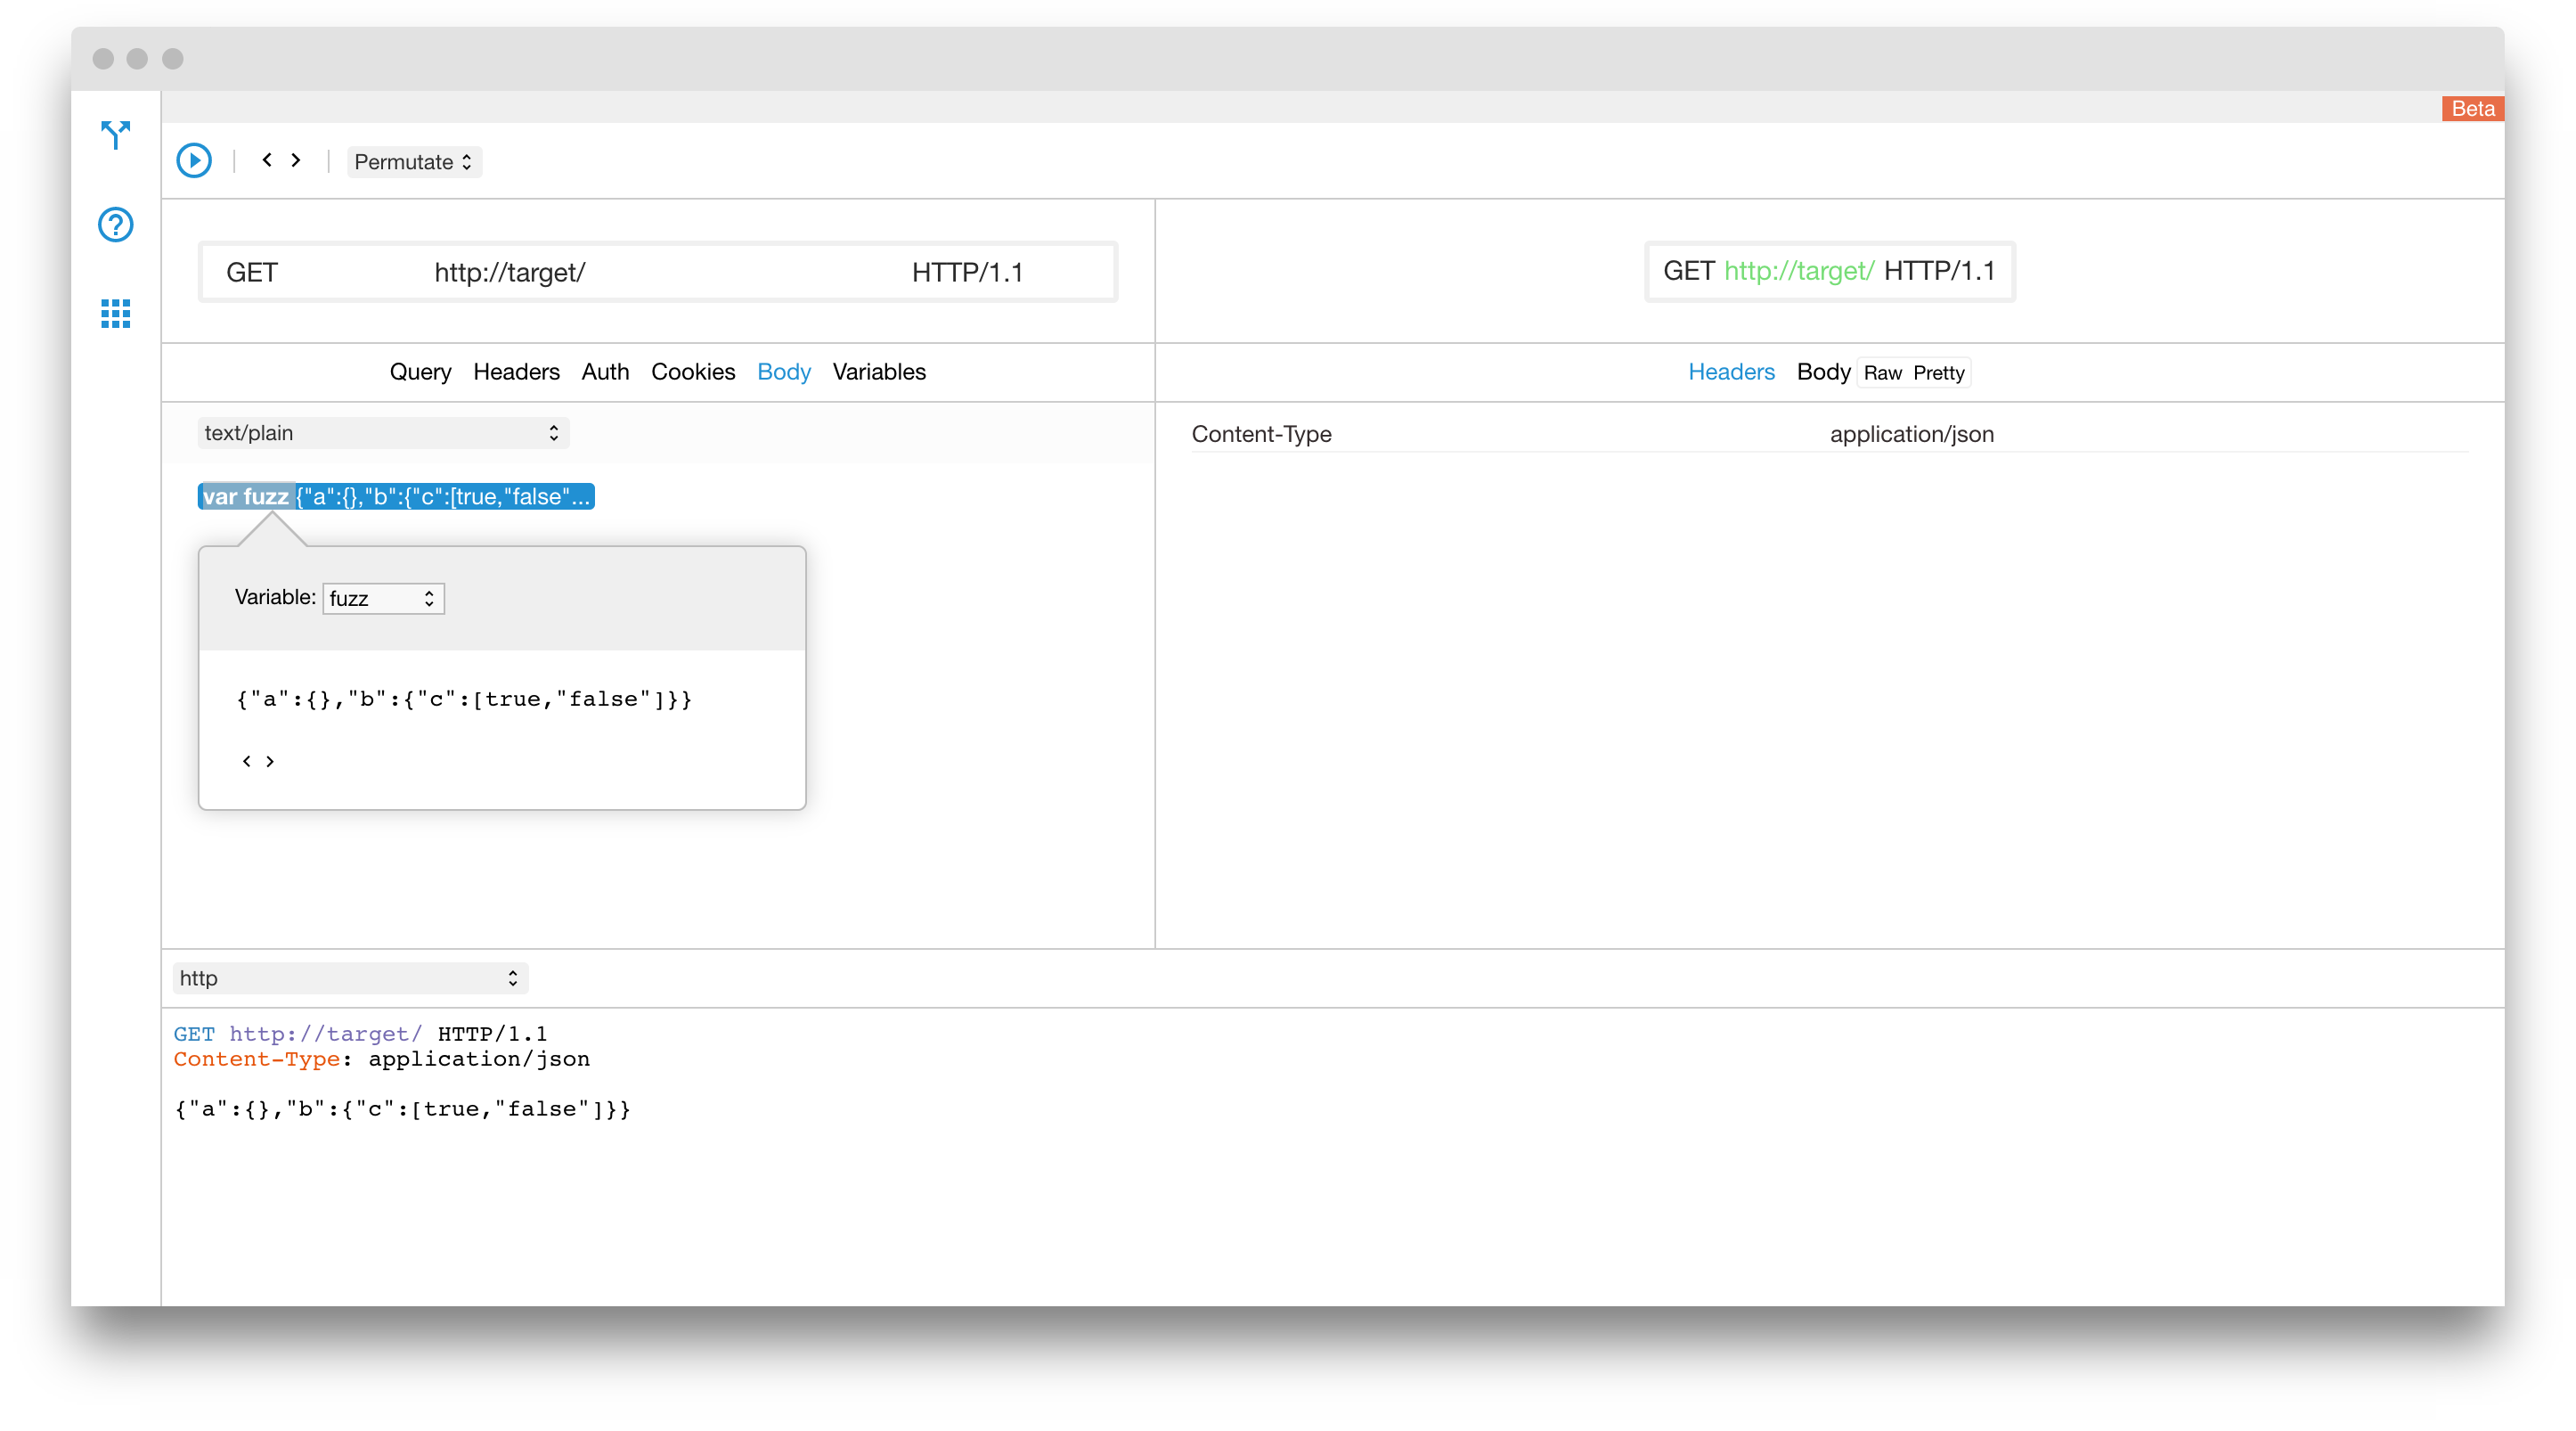
Now if we use the request preview buttons we can see how this is going to work in practice.
Conclusion
As you can see, it is fairly trivial create complex fuzz-testing attacks using transforms, generators and variables. By mashing these together we can quickly create very interesting test scenarios which typically require a lot of programming to get right. With the SECAPPS tools you can get these tasks done in minutes.